Chickpea Chocolate Chip Cookies

Soft, Chewy & Protein-Packed – The Ultimate Chickpea Chocolate Chip Cookies!
These flourless, high-protein cookies come together in under 30 minutes with simple, wholesome ingredients like chickpeas, dates, and nut butter.
Easy to make, perfectly soft on the inside, slightly crispy on the outside, and loaded with melty chocolate chips—your new favorite healthy, protein-rich treat!
- Prep 10 mins
- Cook 15 mins
- Total 25 mins
- Makes for 8-12 cookies
Ingredients:
270g cooked chickpeas (or 1 drained can)
6 soft dates (soaked if needed)
1/2 cup peanut or hazelnut butter
1/3 cup of oat flour
1 tsp of vanilla extract
1/2 tsp of cinnamon
1/2 tsp of baking powder
1/2 tsp of baking soda
- 1/2 cup of chocolate chips

About this recipe:
I’m currently training for the Lisbon half-marathon, so I’m always on the lookout for high-protein, no-sugar snacks to keep me going. Now, I know what you might be thinking—chickpeas in cookies?! Sounds a bit wild, but trust me, you won’t even notice them. They make the cookies soft and delicious, without a hint of “hummus vibes.” I even tested them on a very honest 9-year-old, and she gave them a big thumbs-up! (Although she did suggest swapping the dark chocolate for milk chocolate—fair enough!)
This recipe is super versatile! I’ve made it with hazelnut butter, and it was just as good. You can use any nut or seed butter you like and tweak the sweetness by adjusting the dates. If the batter is a bit runny, just scoop it onto the tray; if it’s thicker, you can roll it into balls with your hands. The best part? These cookies come together in just 25 minutes, making them perfect for a quick, healthy bake—great for little helpers too!
They’ve become my new go-to cookies, and we can’t get enough of them. I hope you love them as much as we do! If you try them, I’d love to hear your thoughts—leave a review and let me know what you think!
Instructions step by step:

Step 1 – Prep the Dates & Oven
Preheat your oven to 170°C (340°F) fan. If your dates are dry, soak them in hot water for 15 minutes, then drain. Remove the pits.

Step 2 – Blend the Chickpeas & Dates
Drain the chickpeas and add them to a food processor. Chop the dates and add them in. Blend until smooth, scraping down the sides as needed.

Step 3 – Mix the Remaining Ingredients
Transfer the chickpea-date paste to a bowl. Blend the oats into flour, then add it along with the remaining ingredients, saving some chocolate chips for topping.

Step 4 – Mix & Scoop the Batter
Use a spatula to mix everything until well combined. Scoop the dough with a cookie scoop or spoon and place it on a baking tray lined with parchment paper, leaving space between each cookie.

Step 5 – Shape & Top
Flatten the cookies slightly with the back of a spoon to your desired thickness (I like them thicker!). Top with extra chocolate chips and bake for 10–15 minutes.

Step 6 – Cool & Enjoy
Start checking the cookies at 10 minutes—they should be golden on the edges but still soft inside. They will be very delicate while hot, so carefully transfer them to a wire rack. Let them cool for 10–20 minutes to firm up before enjoying!

About these Ingredients:
Chickpeas: Chickpeas are the star of these cookies! They provide a protein-packed base while keeping the cookies flourless and wonderfully soft. Packed with fiber, vitamins, and minerals like iron and magnesium, they make these treats healthier and guilt-free. I love using dried chickpeas that I soak overnight and cook in the Instant Pot. Depending on the brand, chickpeas can vary in moisture, which affects the cookie texture—some batches will be firmer, others a bit softer and more crumbly. You can also use jarred or canned chickpeas if you’re short on time.
Dates: Dates are the natural sweetener in these cookies, bringing a rich, caramel-like sweetness without the need for refined sugar. They also add a hint of moisture and contribute to the soft texture of the cookies. I love using soft, pitted dates in this recipe for their perfect balance of sweetness and fiber. If you prefer, you can swap the dates for date syrup or maple syrup for a smoother, more liquid sweetener. Just be sure to adjust the amount, as they’re a bit sweeter and may alter the dough’s consistency.
Peanut Butter: Peanut butter adds a rich, creamy texture and a nutty flavour that perfectly complements the sweetness of the dates and chocolate chips. It also provides extra protein and healthy fats. Plus, it helps bind the dough and contributes to that soft, chewy texture. Any nut butter works well here, so feel free to experiment with almond butter, cashew butter, or even hazelnut butter. Hazelnut is my personal favourite—it offers a slightly different taste but still delivers that creamy, nutty richness that makes these cookies even more delicious.

Oat: Oats are a key ingredient in these cookies, helping to provide structure and a lovely chewy texture. They’re also a great source of fibre, keeping these treats wholesome and satisfying. I use oat flour here, which is simply blended oats, making it naturally gluten-free. If you don’t have oat flour on hand, you can easily substitute it with chickpea flour. Chickpea flour will give a slightly denser texture but still works well, adding extra protein and a slight nutty flavour to the cookies.
Baking Powder & Baking Soda: Both baking powder and baking soda play an important role in giving these cookies the perfect texture. Baking soda helps them spread slightly and creates a light, chewy texture, while baking powder provides a little extra lift, ensuring the cookies aren’t too dense. Together, they work to make these cookies soft on the inside with just the right amount of firmness on the outside. They’re both essential for achieving that perfect balance of lightness and chewiness without any flour!
Cinnamon & Vanilla Extract: Cinnamon and vanilla extract are the flavour heroes of these cookies, adding warmth and depth to every bite. The cinnamon gives a subtle, comforting spice that pairs beautifully with the nutty flavour of the peanut butter and the sweetness of the dates. Vanilla extract enhances all the flavours, bringing out the natural sweetness and adding a touch of aromatic richness. Together, they make these cookies taste extra indulgent, with just the right balance of spice and sweetness.
Chocolate Chips: The chocolate chips are the ultimate finishing touch in these cookies, adding a rich burst of chocolatey goodness in every bite. I use 70% dark chocolate for its bold, slightly bittersweet flavour that pairs perfectly with the natural sweetness of the dates. If you prefer a sweeter cookie or are using a chocolate with a lower cocoa percentage, you may want to reduce the amount of dates slightly to balance the sweetness. Either way, these chocolate chips make each cookie irresistibly delicious!

Chickpea Chocolate Chip Cookies
Marisa MarquesEquipment
- 1 Food processor
- 1 Oven tray
Ingredients
- 270 gr of cooked chickpeas or 1 can drained
- 6 soft dates soaked if needed
- 1/2 cup of peanut or hazelnut butter
- 1/3 cup of oat flour
- 1 tsp of vanilla extract
- 1/2 tsp of cinnamon
- 1/2 tsp of baking powder
- 1/2 tsp of baking soda
- 1/2 cup of chocolate chips (check notes below)
Instructions
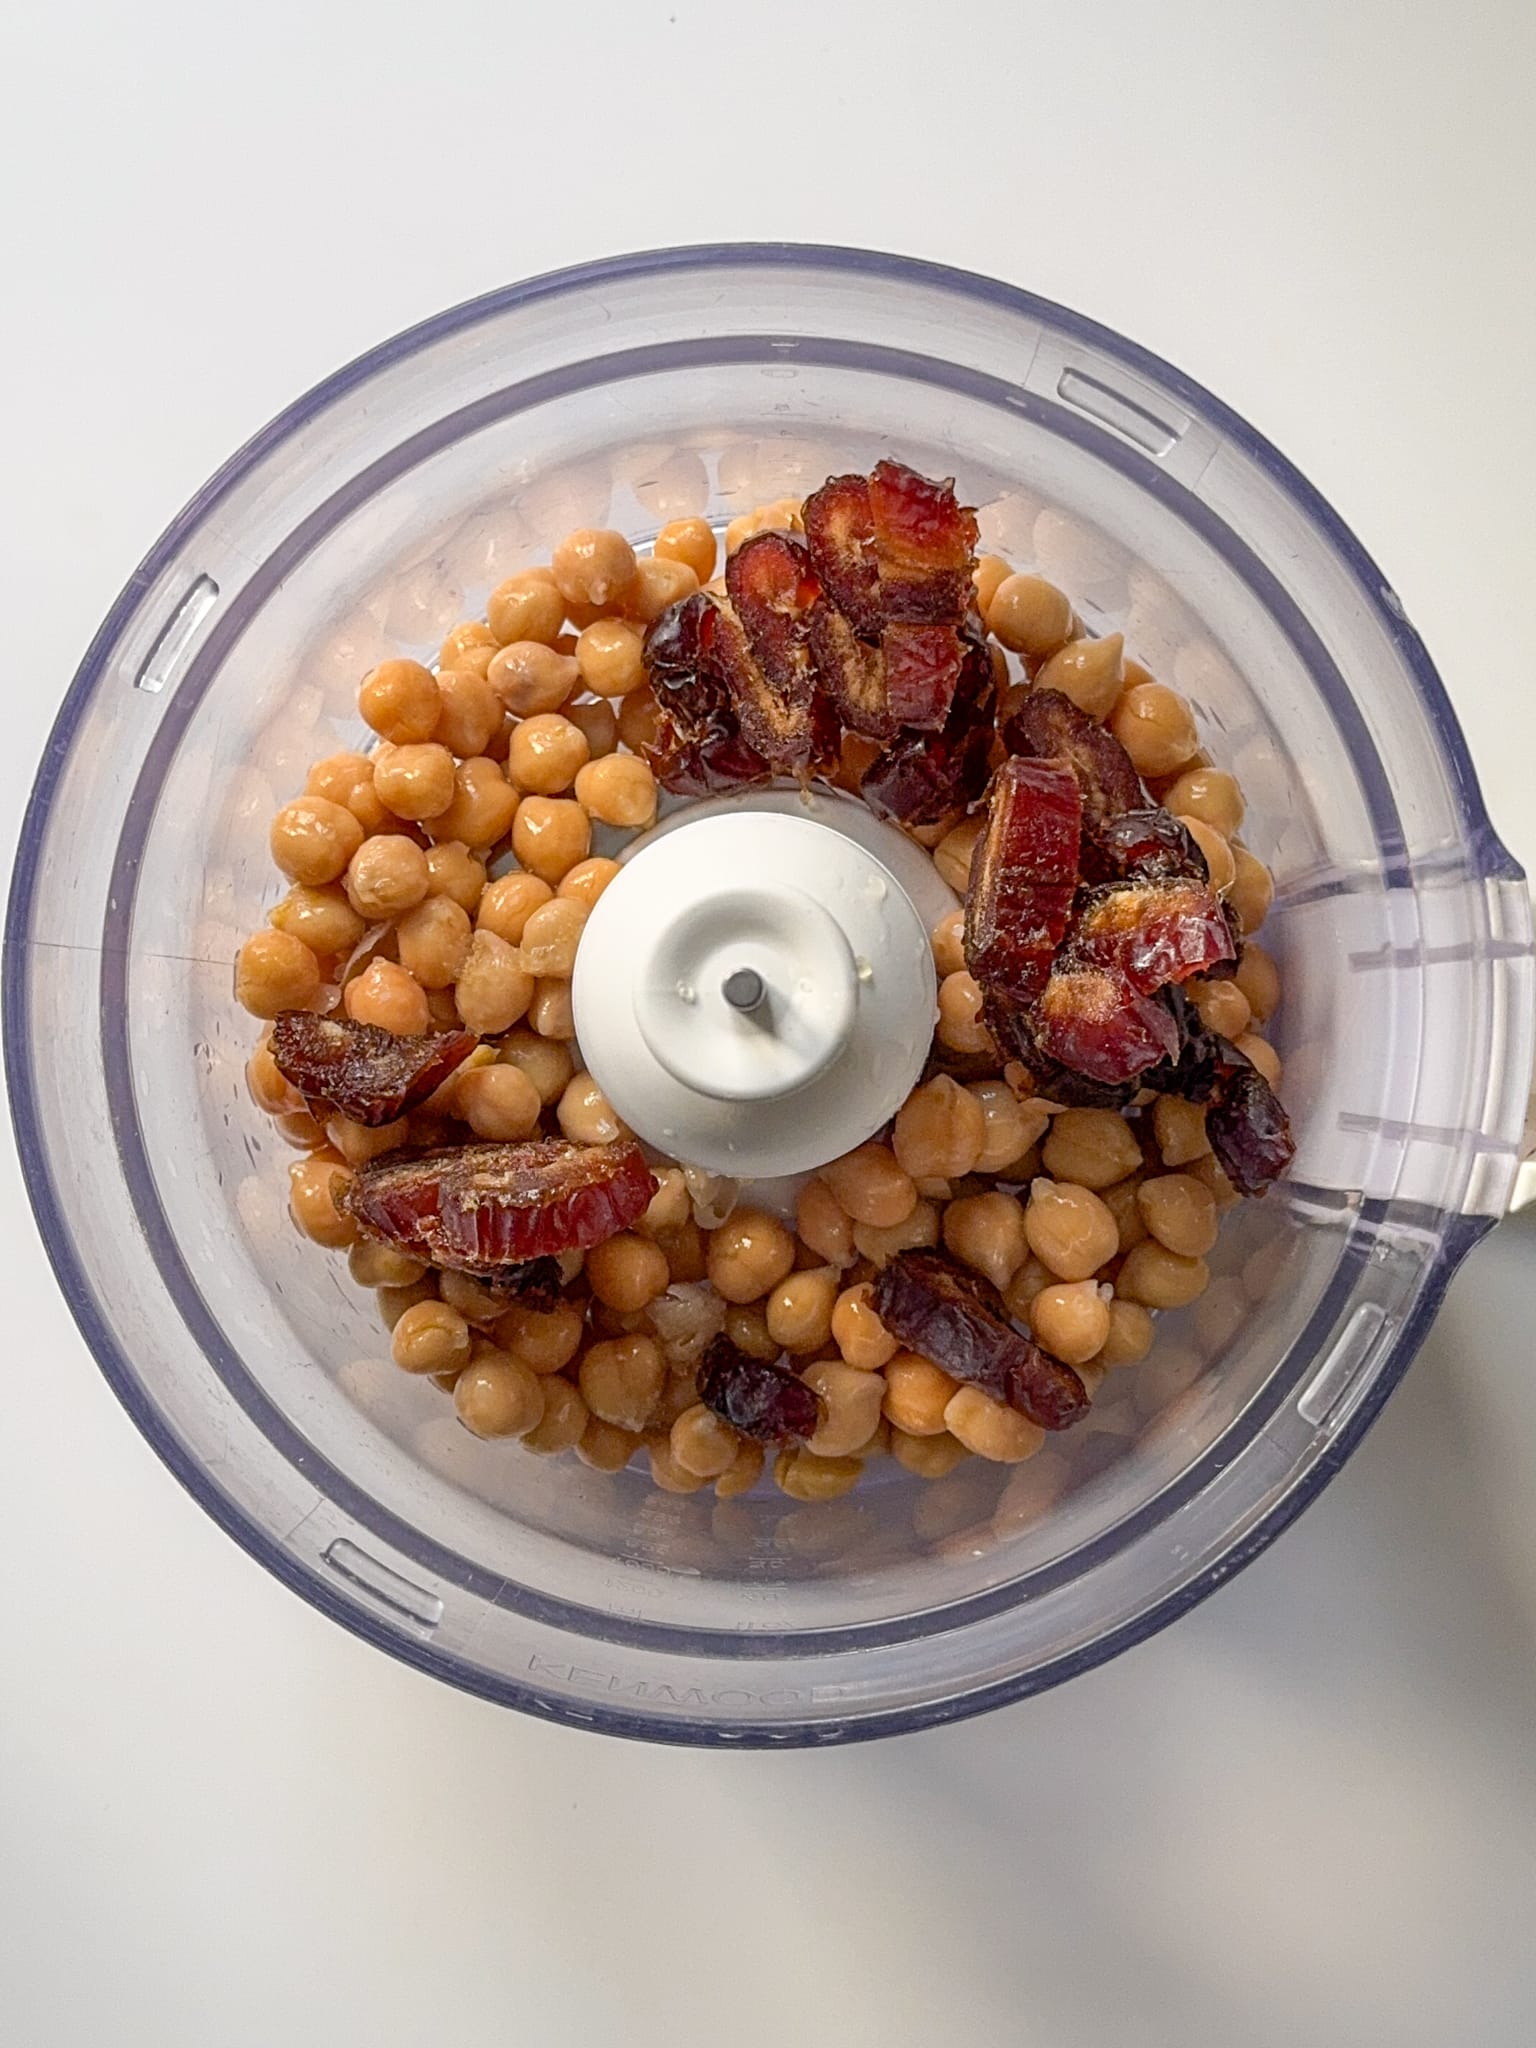
- Prep the Dates & OvenPreheat your oven to 170°C (340°F) fan. If your dates are dry, soak them in hot water for 15 minutes, then drain. Remove the pits.
- Blend the Chickpeas & DatesDrain the chickpeas and add them to a food processor. Chop the dates and add them in. Blend until smooth, scraping down the sides as needed.
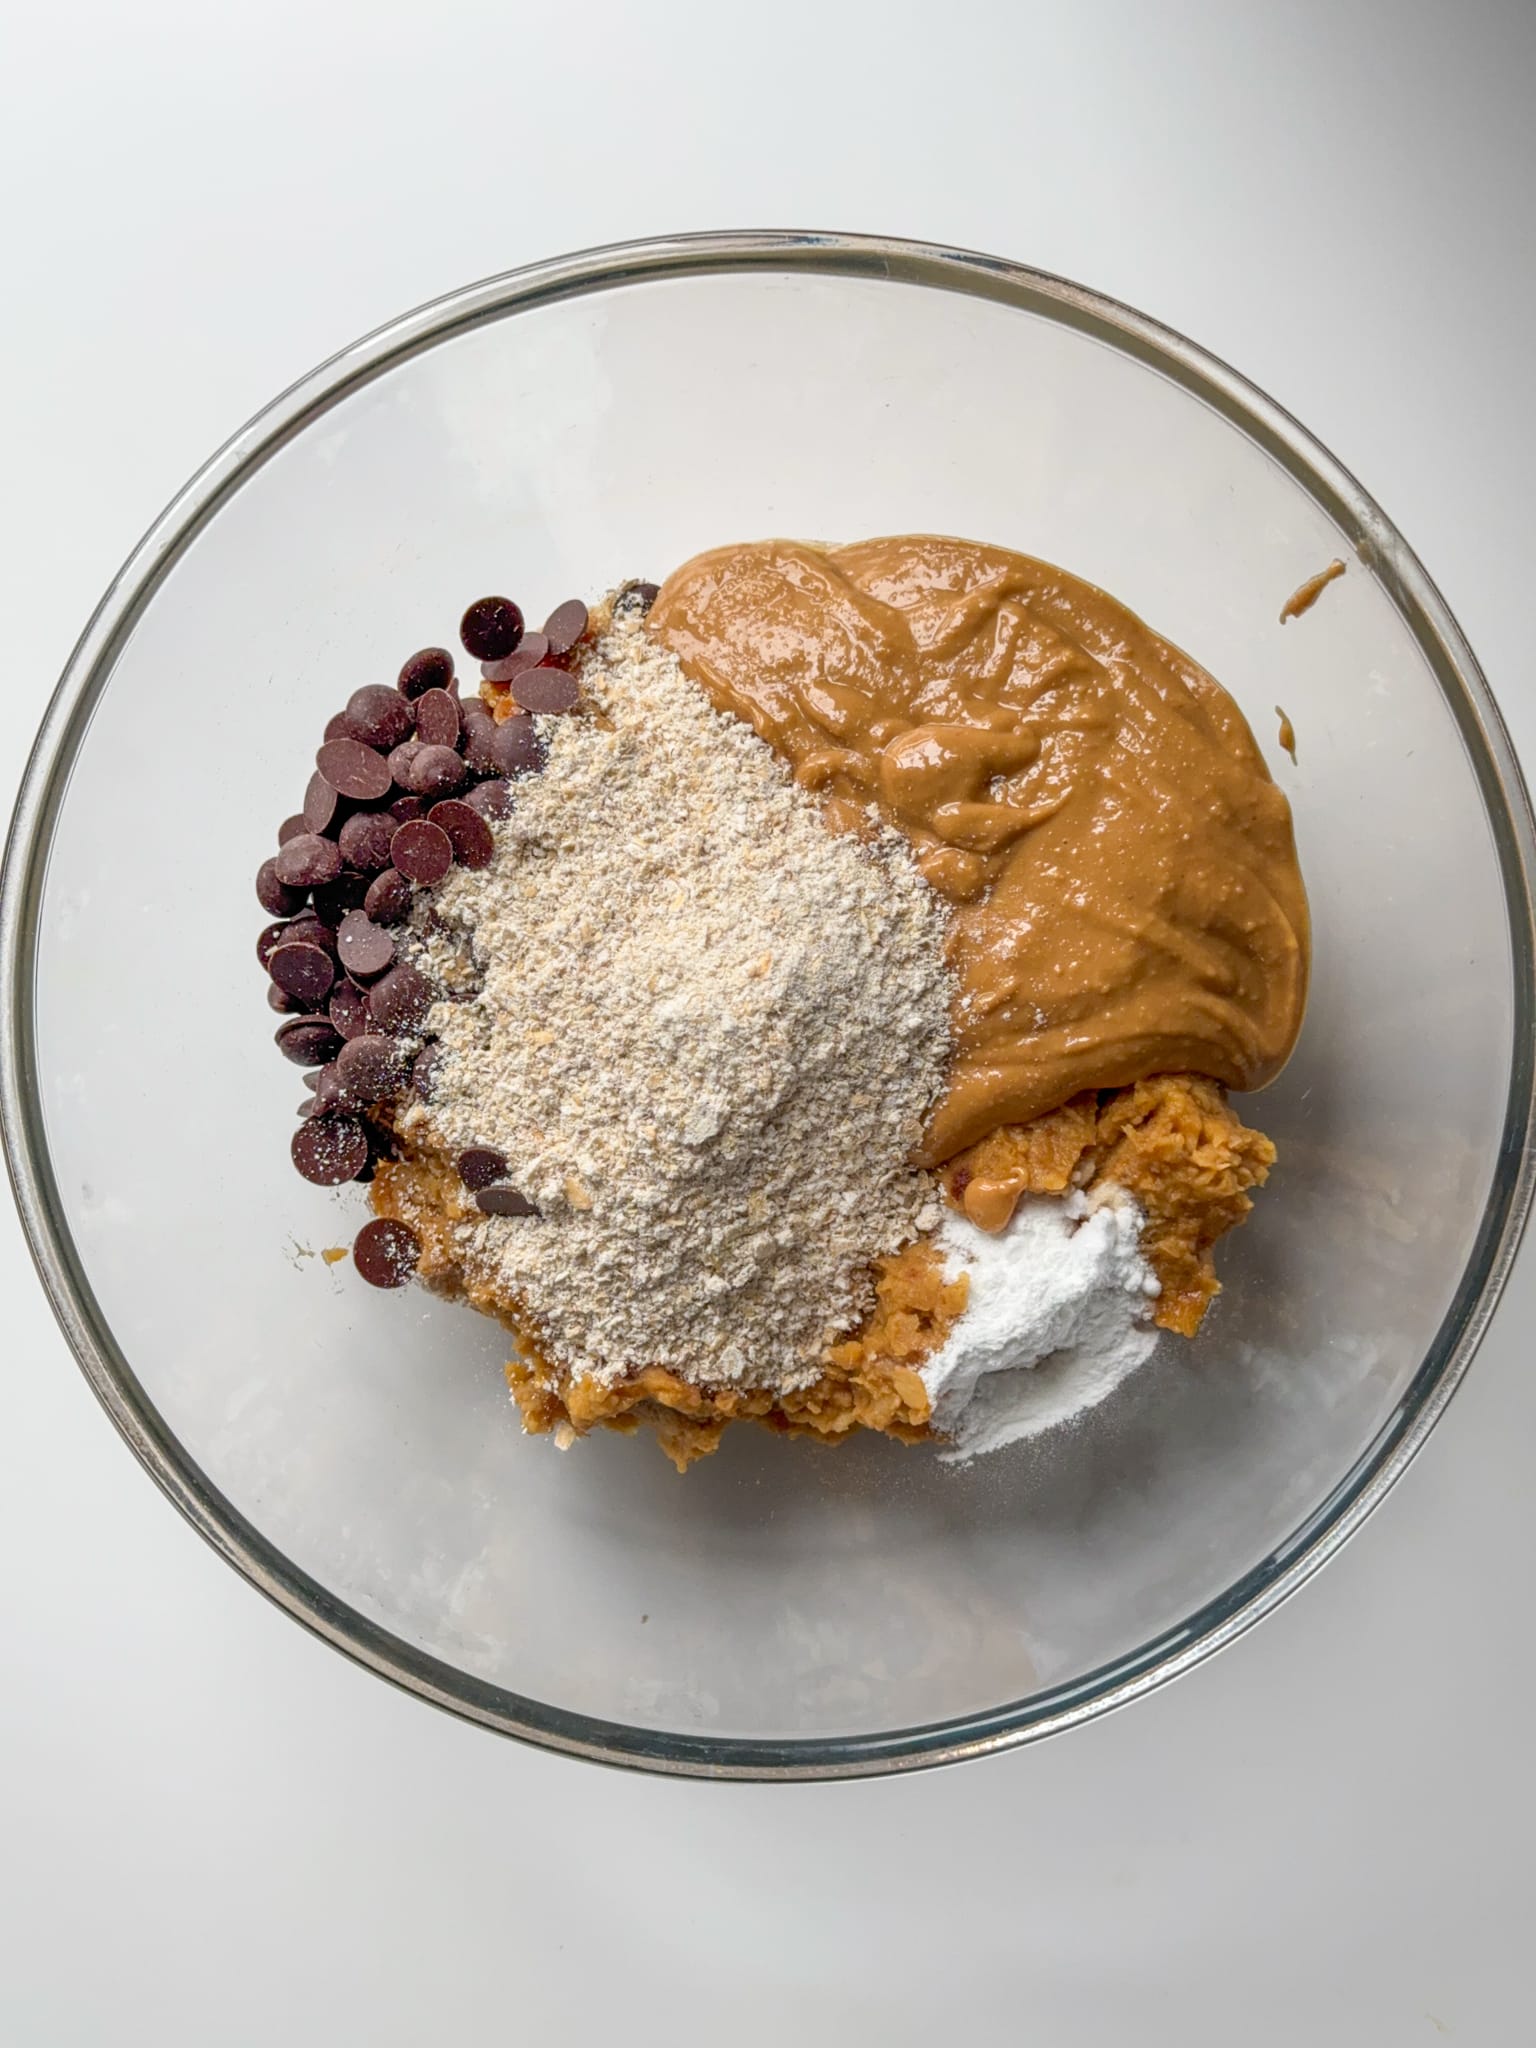
- Mix the Remaining IngredientsTransfer the chickpea-date paste to a bowl. Blend the oats into flour, then add it along with the remaining ingredients, saving some chocolate chips for topping.
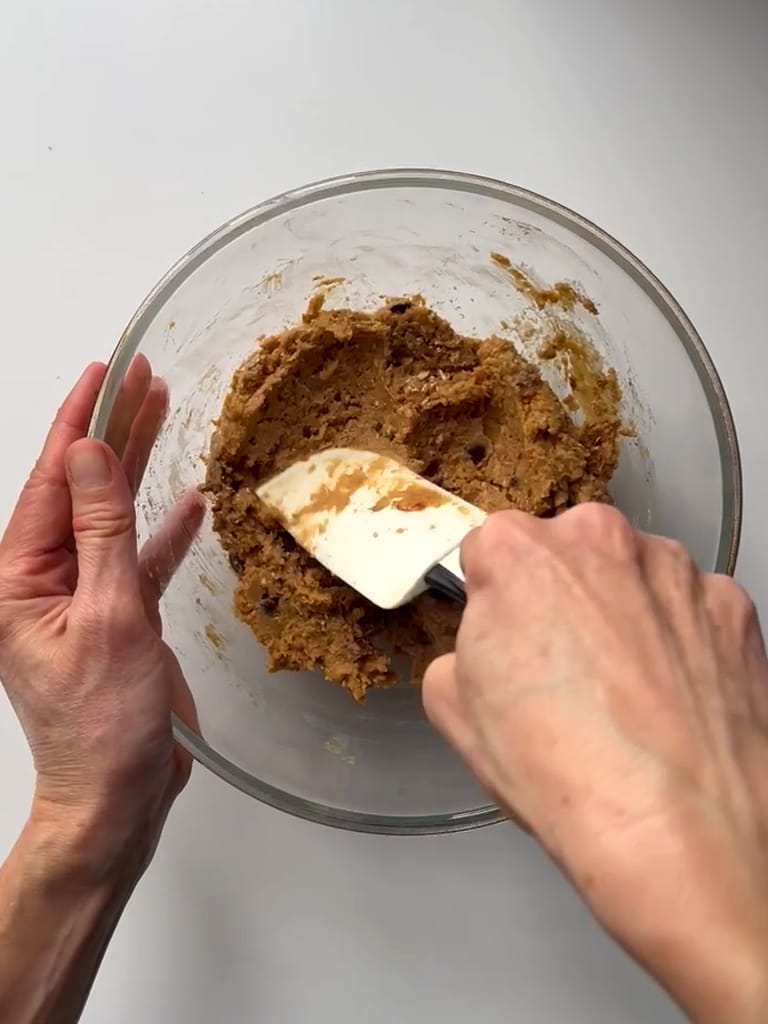
- Mix & Scoop the BatterUse a spatula to mix everything until well combined. Scoop the dough with a cookie scoop or spoon and place it on a baking tray lined with parchment paper, leaving space between each cookie.
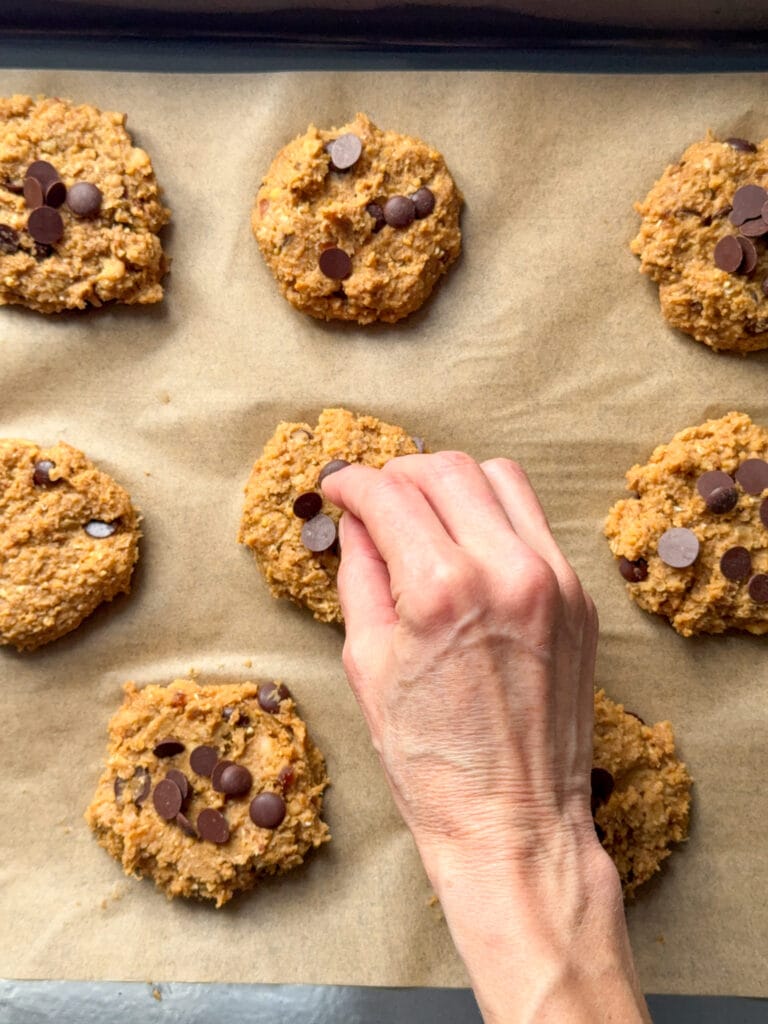
- Shape & TopFlatten the cookies slightly with the back of a spoon to your desired thickness (I like them thicker!). Top with extra chocolate chips and bake for 10–15 minutes.
- Cool & EnjoyStart checking the cookies at 10 minutes—they should be golden on the edges but still soft inside. They will be very delicate while hot, so carefully transfer them to a wire rack. Let them cool for 10–20 minutes to firm up before enjoying!
Notes
- protein-packed |
- fiber-rich |
- chickpeas |
- vegan |
- comforting
Did you make this recipe?
Please tag us on @fromplantswithlovekitchen
There are no reviews yet. Be the first one to write one.