


Sprouting
Easy & NutritiousSprouting seeds at home turns ordinary seeds into nutrient-packed microgreens in just days—perfect for salads, sandwiches, and smoothies. Simply rinse and drain every 12 hours until they sprout.I love a crunchy blend of radish, alfalfa, and broccoli seeds, but if you’re new to sprouting, start with broccoli seeds and branch out from there.
Equipment
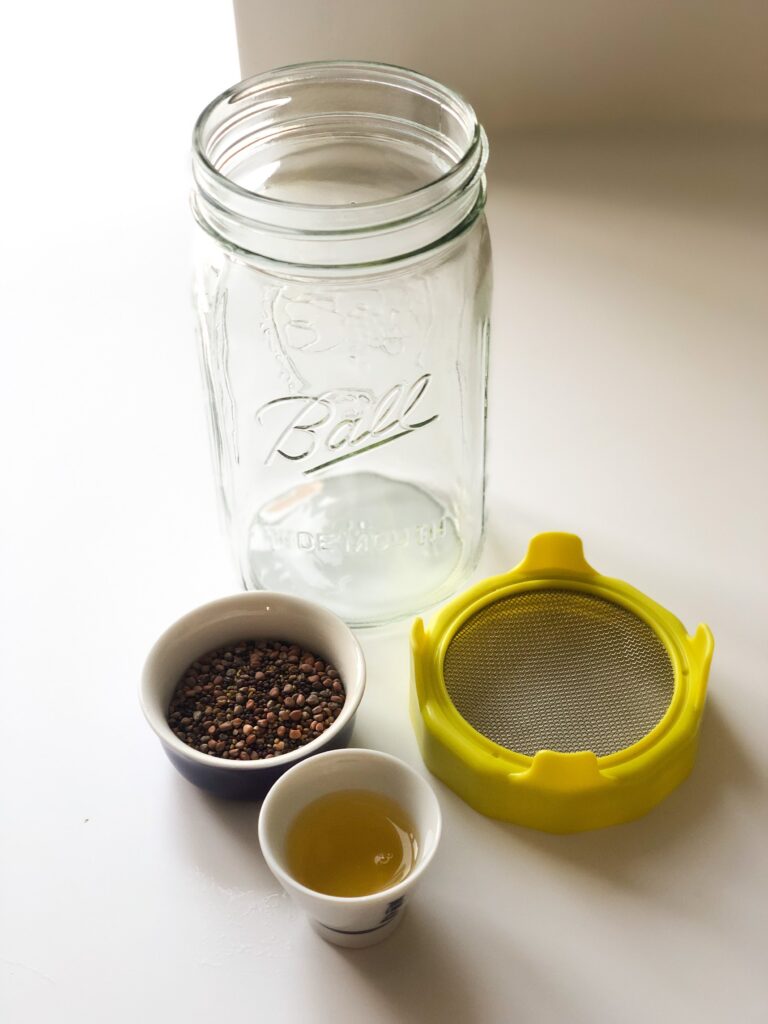
- 1 Wide mouth Jar
- 1 mesh lid or a clean cheese cloth and a rubber band
Ingredients
- 2 Tbsp of seeds Radish, Alfalfa and Broccoli
- 1 Tbsp of Apple Cider vinegar
Instructions
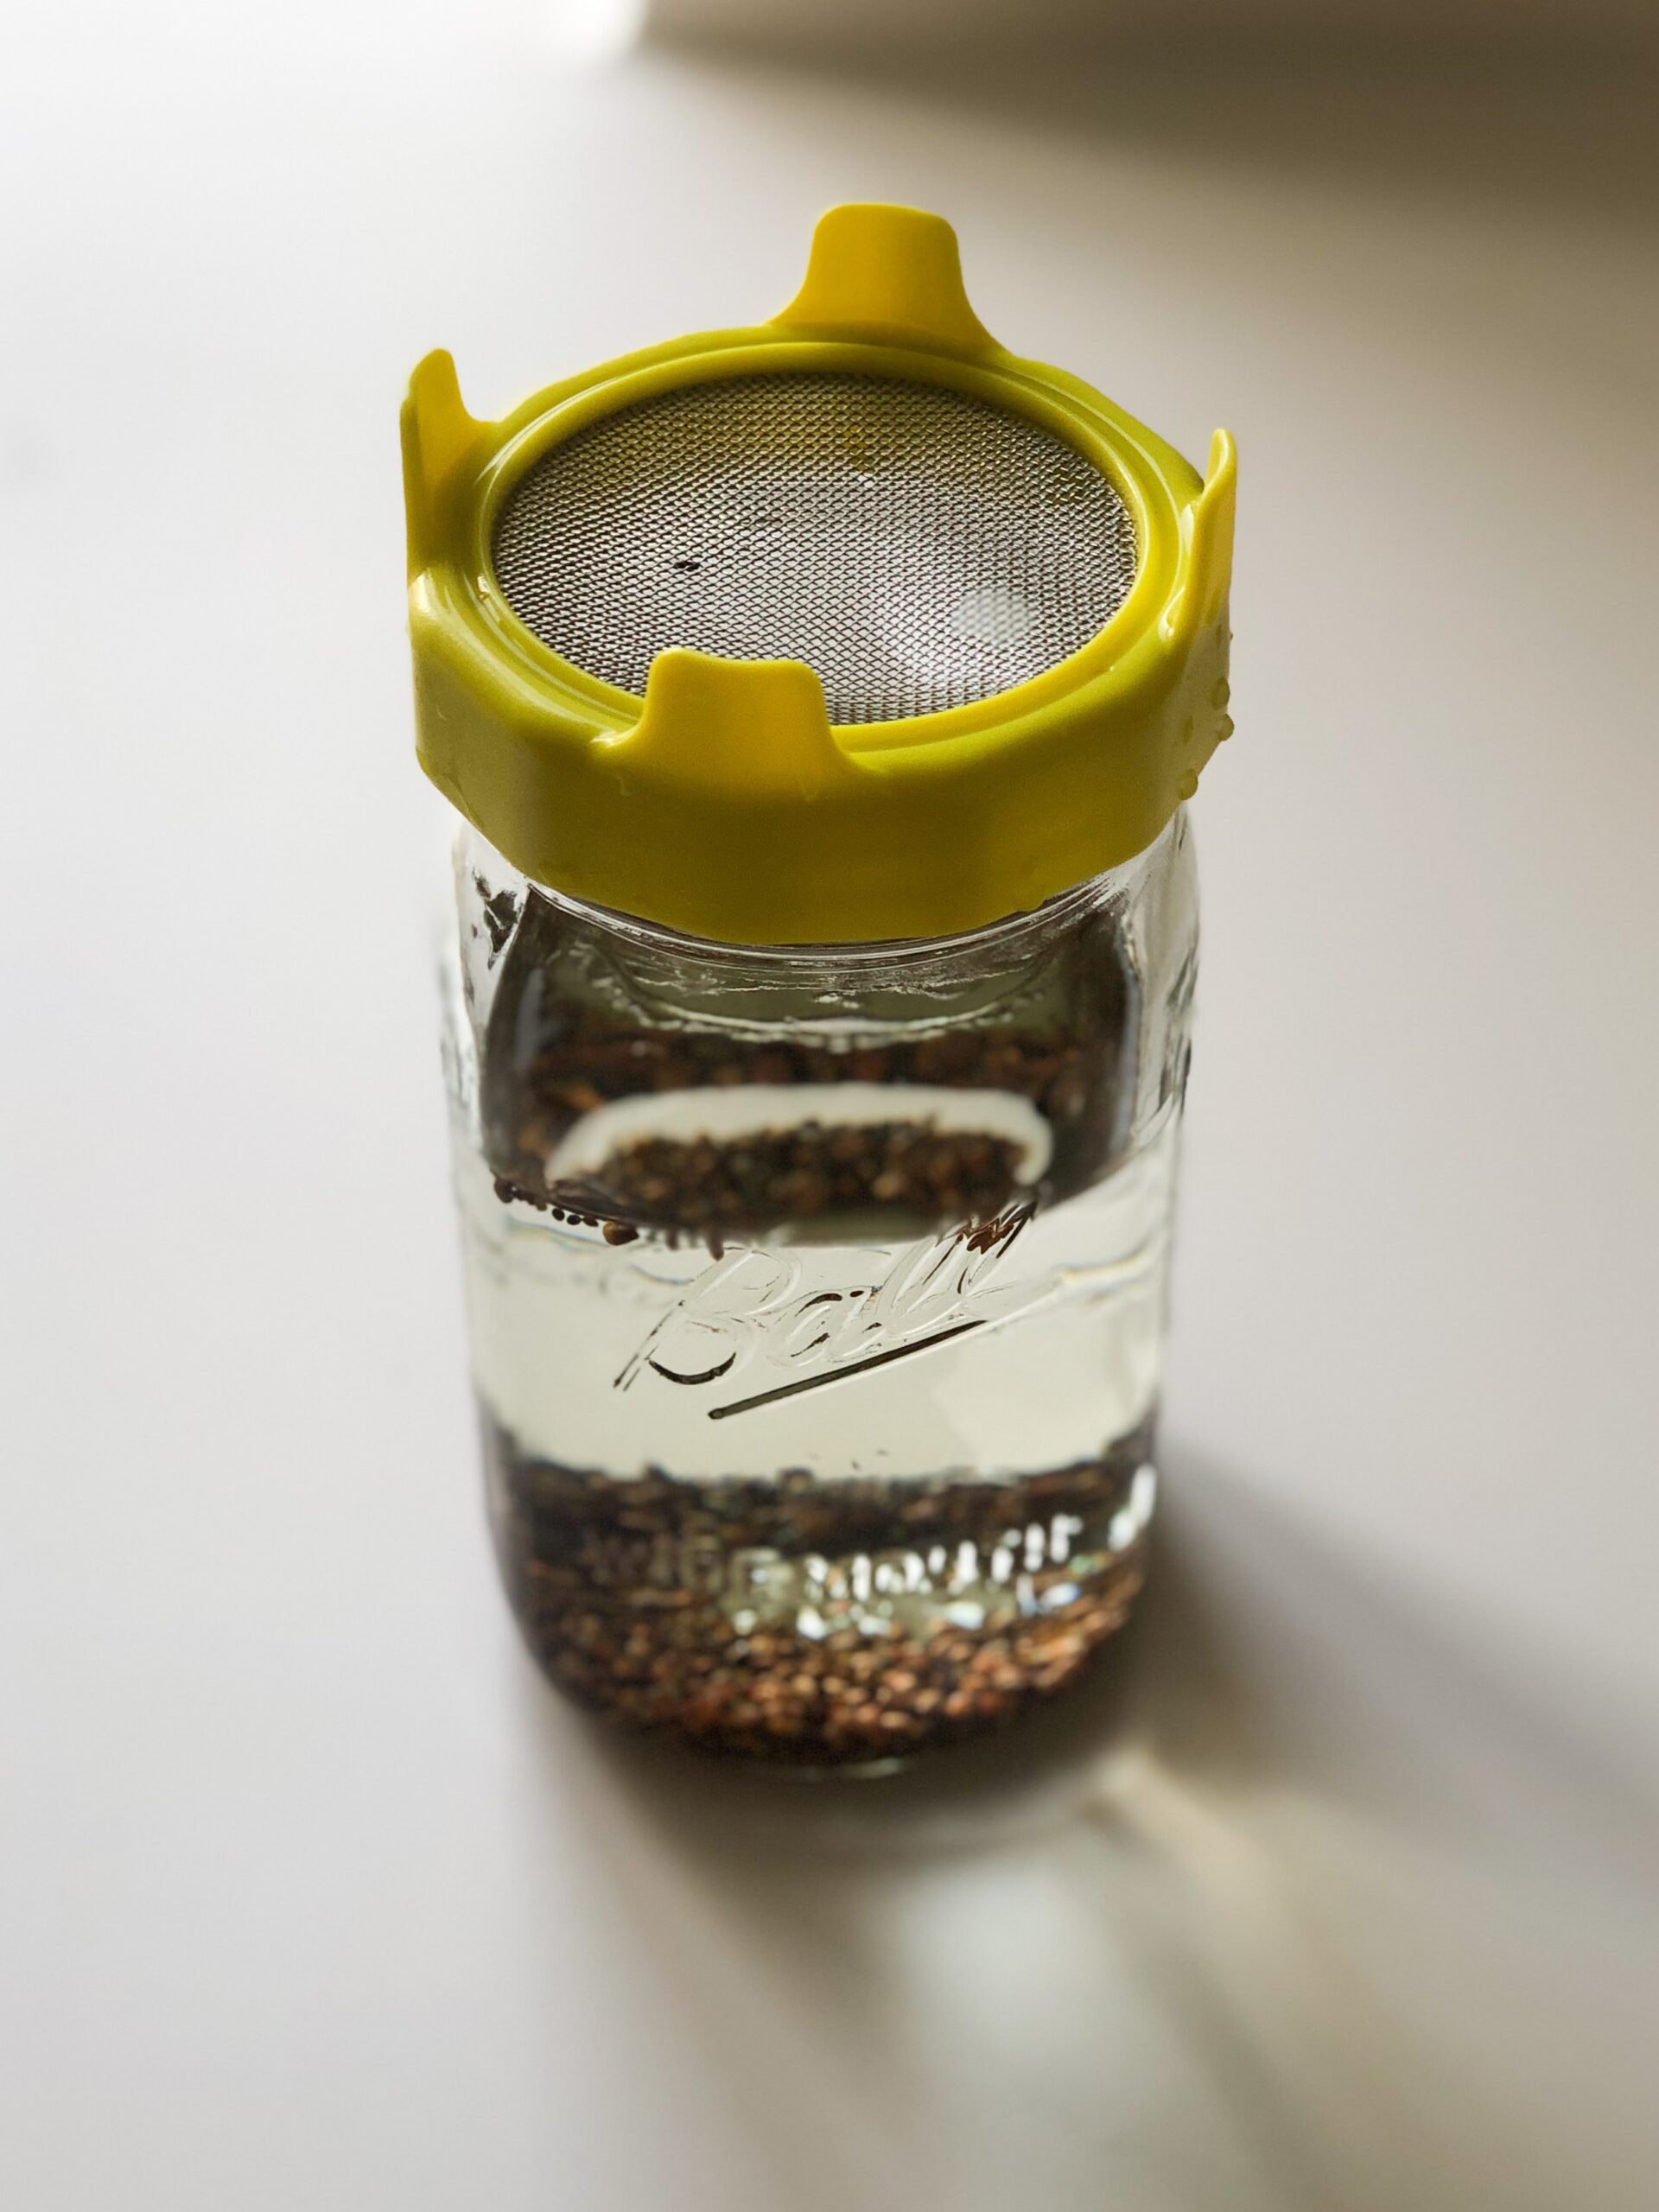
- Initial SoakSoak the seeds in filtered water with vinegar for 10 minutes. Discard the water and vinegar, then rinse the seeds three times with fresh water. Soak them again in filtered water for 8–12 hours in a dark place, such as a kitchen cupboard.
- First Rinse and DrainThe next morning, discard the soaking water, rinse the seeds with fresh filtered water, and drain well. Spread the seeds evenly inside the jar. From now on, store the jar upside down or on its side to ensure proper airflow and drainage.
- Daily RinsingRinse and drain the seeds every 12 hours, making sure they are evenly distributed in the jar each time. Return the jar to the dark cupboard after each rinse.
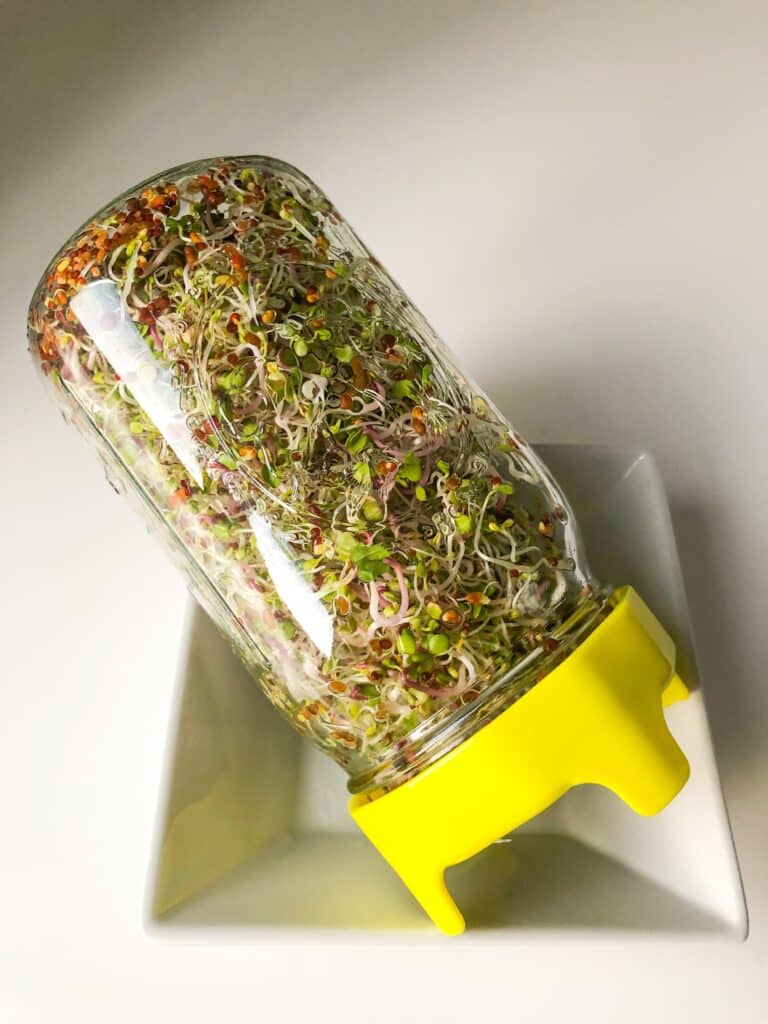
- Introduce LightAfter 4–5 days (sooner in warm weather, longer in cold weather), rinse the seeds in the morning and place the jar near a window to expose them to light. They will quickly turn pale green.
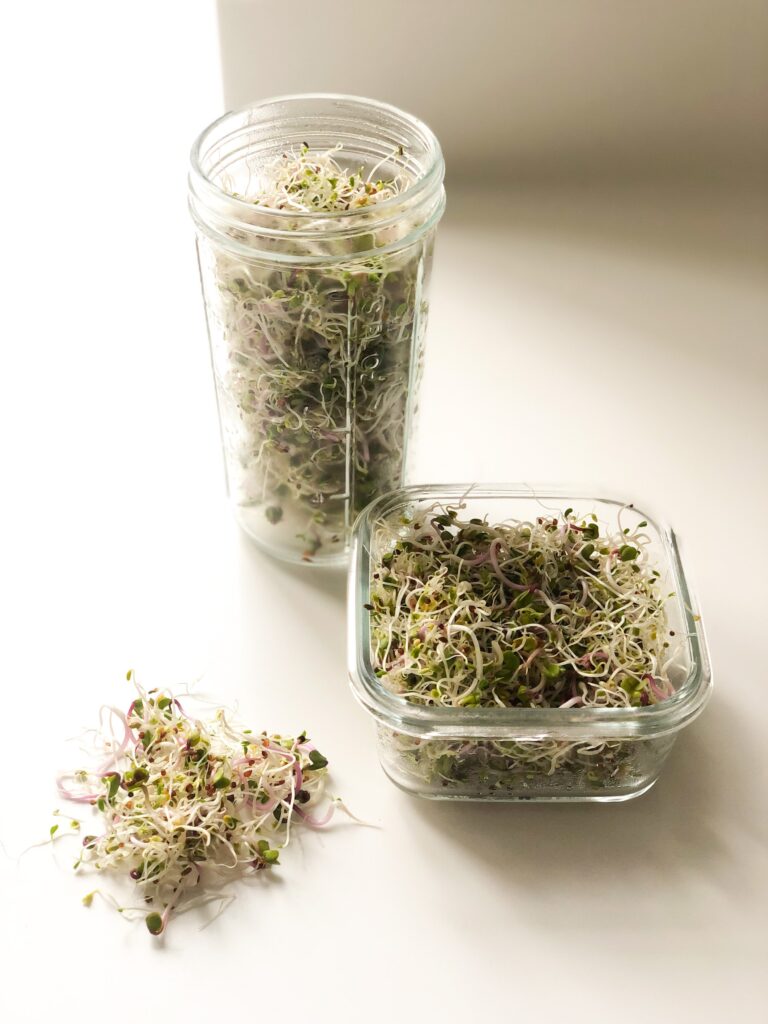
- Harvest the SproutsAfter 6–8 hours in the light, the sprouts will turn light green and be ready to harvest. Place the jar in the sink, remove the lid, and fill it with clean filtered water to the top. This will cause the shells to float to the surface—scoop out as many as you can.
- Dry and StoreDrain all the water from the sprouts and let the jar stand upside down for 10 minutes. Spread the sprouts on a paper towel over a metal rack and let them dry for 1 hour. Store them in a glass container in the fridge for up to 5 days.
Notes
If you’ve never tried sprouting before, I’d recommend starting with broccoli seeds. Broccoli sprouts pack 100 times more phytochemicals than a mature broccoli head—they’re like a tiny, nutrient-dense version of the full-grown plant! They’re fresh, budget-friendly, and grow incredibly fast.
Plus, it’s so rewarding to watch them sprout—kids especially love it! Just remember to keep them in a dark place (I use my kitchen cupboard). To stay on track, I set a phone reminder every 12 hours—no more forgetting! 😊